How to get into my situation#
When I decided to deploy a virtualized instance of TrueNAS on my Proxmox host, the goal was straightforward: consolidate storage services while still sharing the same physical hardware with other virtual machines. By running TrueNAS as a VM instead of on bare metal, I expected to maintain flexibility in resource allocation while keeping my existing storage infrastructure intact.
The system already contained several HDDs that were previously configured as a ZFS pool during an earlier installation. Rather than recreating the storage from scratch, the plan was to simply import the existing pool into the newly installed TrueNAS VM. In theory, ZFS should detect the pool automatically as long as the disks are presented correctly to the system.
However, after completing the installation and booting TrueNAS, the expected pool was nowhere to be found. Instead of offering to import the existing ZFS pool, the interface only suggested creating a new one. Looking deeper into the disk configuration revealed that the drives were being presented to the VM as virtual disks rather than as the original physical devices.
That observation immediately suggested that something was wrong with the way the storage hardware had been passed through from Proxmox to the virtual machine. Initially, the focus was on passing individual disks to the VM, but it quickly became clear that this was not the correct approach for ZFS-based systems like TrueNAS. ZFS works best when it has direct control over the storage hardware, which typically means passing through the entire storage controller rather than individual drives.
After identifying the relevant controller in the host system, I configured it for PCI passthrough and attached it to the TrueNAS VM. Confident that this would solve the problem, I booted the virtual machine again.
Instead of success, the result was immediate: the system crashed.
At that moment it became clear that simply attaching the controller was not enough. Proper PCI passthrough requires several prerequisites and configuration steps on the host system before it can work reliably. Missing even one of these steps can result in unstable behavior or complete system failure.
In the following sections, I will explain how to recognize when passthrough is incorrectly configured, how to diagnose the problem, and the exact steps required to implement a stable controller passthrough setup for TrueNAS on Proxmox.
Summary of steps#
- BIOS Foundation - configuring settings in the BIOS/EFI
- Identify and Isolate Hardware - prevent host from claiming hardware we want to pass to the VM
- The Bootloader (Legacy vs. EFI) - instruct the boot process to individually pass-through devices
- The “Anti-Crash” Secret (ACS Override) - split IOMMU groups into individual groups
- Verification & Safety Check - verify our changes
- VM Configuration - Correctly configure VM pass-through settings
Phase 1 - The Bios Foundation#
Before touching software, the hardware must be told to allow isolation. For AMD systems the following three changes need to be set in the BIOS.
- SVM Mode: Enabled (Virtualization)
- IOMMU: Enabled (Not “Auto”)
- ACS: Enabled (Allows PCIe device separation).
Making changes in your BIOS depends on the make and model. Below is an example of my bios settings on a ASRock - B550M Phantom Gaming 4 motherboard.
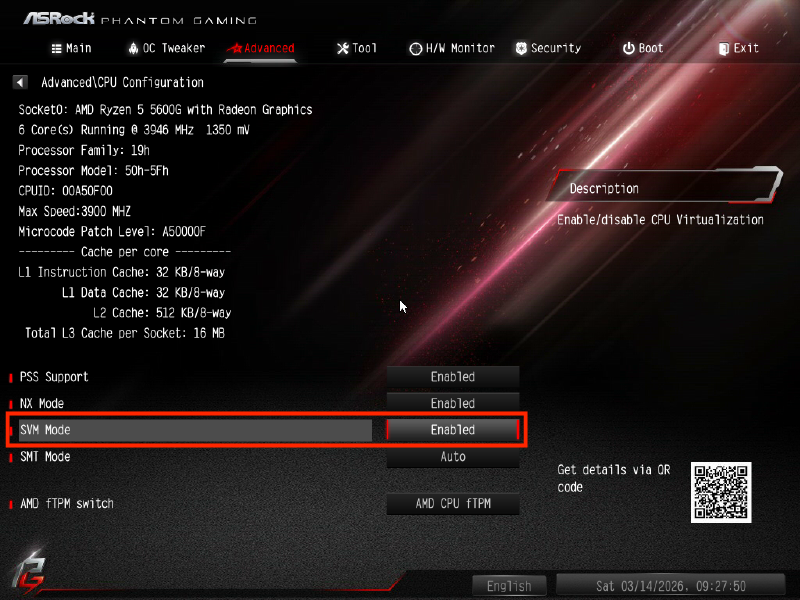
SVM Mode#
- Advanced > CPU Configuration
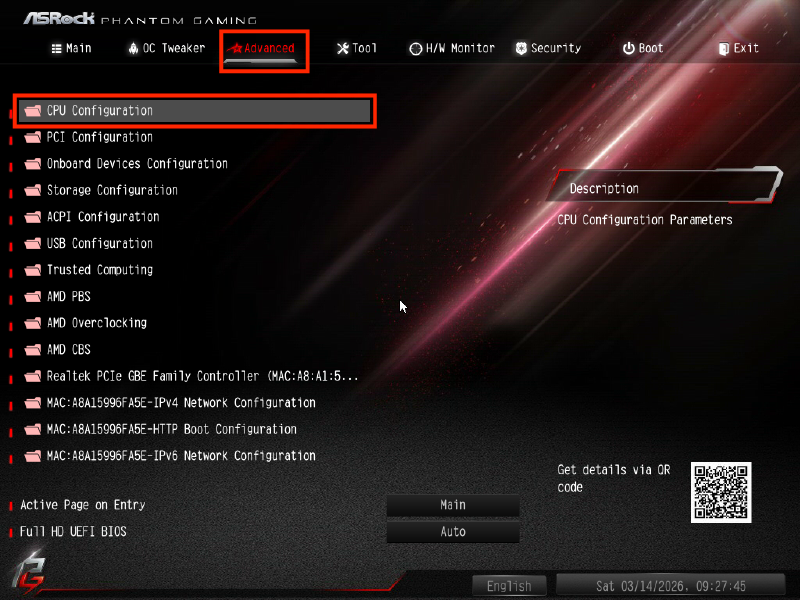
- Enable SVM Mode
IOMMU#
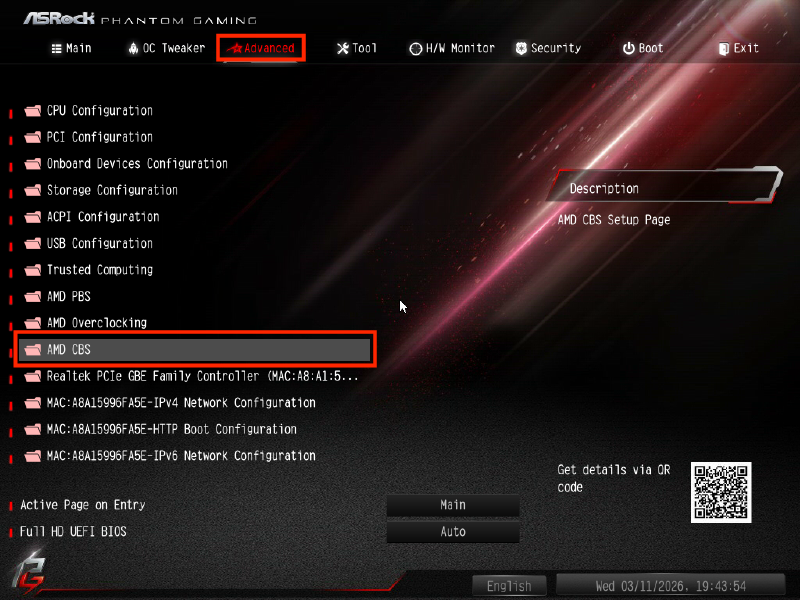
- Advanced > AMD CMS
- NBIO Common Options
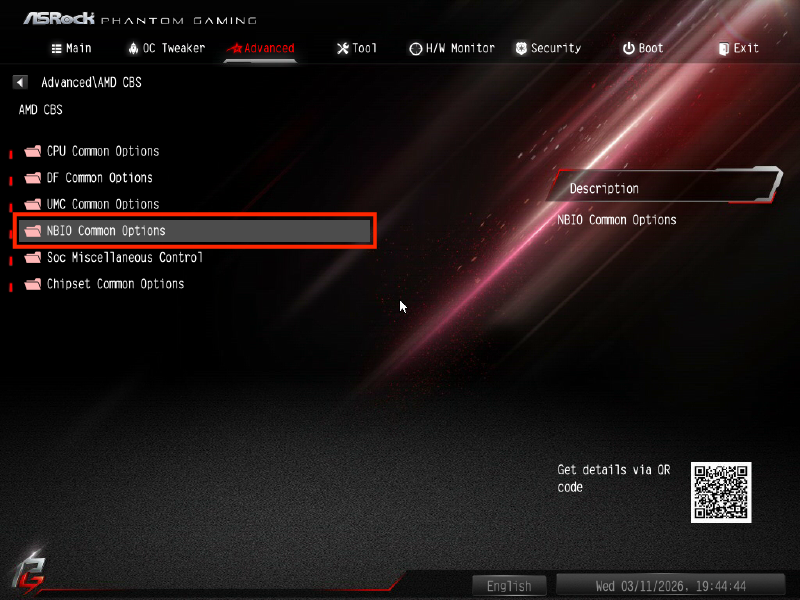
- Enable IOMMU
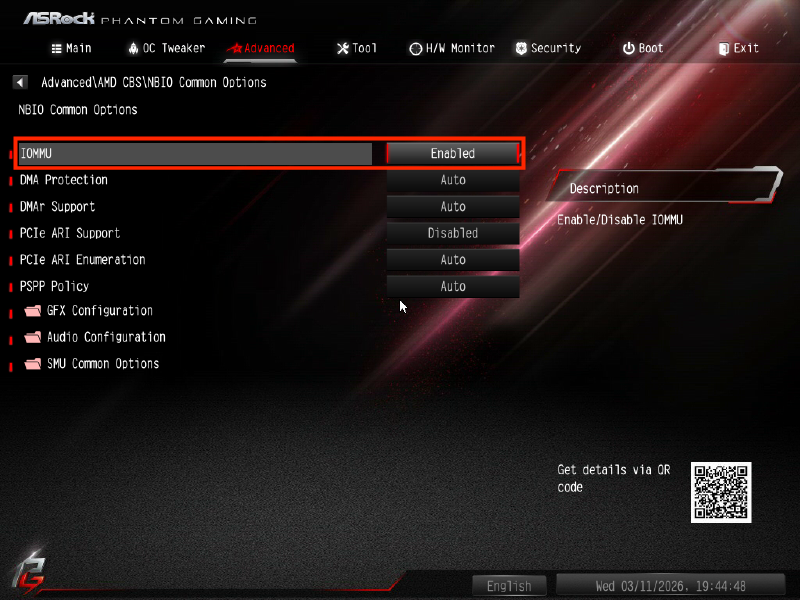
- Boot back into OS
ACS#
- Advanced > AMD CBS > NBIO Common Options
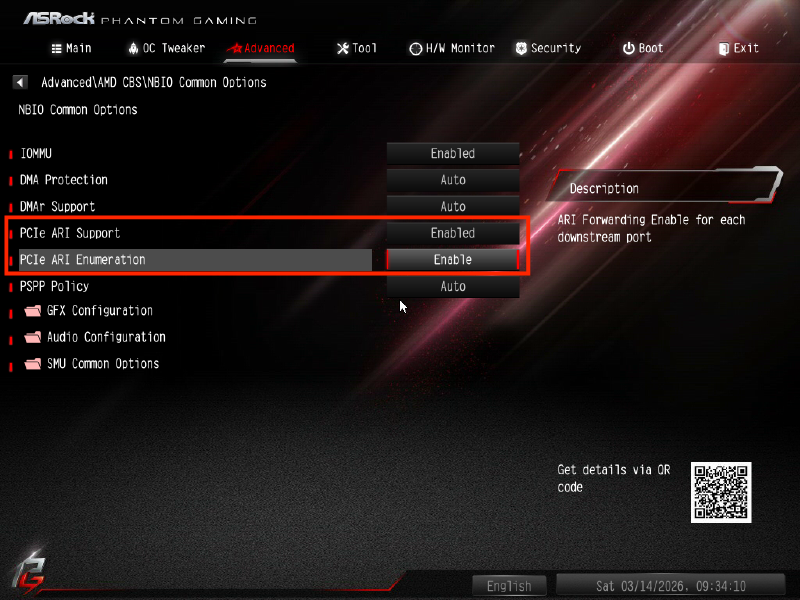
- Enable both
- PCIe ARI Support
- PCIe ARI Enumeration
Validation#
Run the following command in your Proxmox shell to validate if IOMMU is enabled.
dmesg | grep -e DMAR -e IOMMULook for AMD-Vi: IOMMU enabled.
Phase 2 - Identify and Isolate Hardware#
In this phase, we need to tell the Proxmox host not to touch the hardware so it can be handled by a VM.
- Find the Vendor IDs: run
lspci -nn.- In my example, SATA Controller is
[1b21:1166]and NVMe is[c0a9:540a].
- In my example, SATA Controller is
- Configure VFIO: Create
/etc/modprobe.d/vfio.conf. This forces the passthrough driver to “claim” the devices first.
options vfio-pci ids=1b21:1166,c0a9:540a disable_idle_d3=1
softdep nvme pre: vfio-pci
softdep ahci pre: vfio-pci
Phase 3 - The Bootloader (Legacy vs. EFI)#
This is the step where most people fail. We must apply settings to the active bootloader.
- Determine your boot type
Run:
[ -d /sys/firmware/efi ] && echo "EFI" || echo "Legacy" - Edit the correct file
- If Legacy (GRUB): Edit
/etc/default/grub.GRUB_CMDLINE_LINUX_DEFAULT="quiet amd_iommu=on iommu=pt pcie_acs_override=downstream,multifunction"- Run:
update-grub
- If EFI (systemd-boot): Edit
/etc/kernel/cmdline.- In my case:
root=ZFS=rpool/ROOT/pve-1 boot=zfs quiet amd_iommu=on iommu=pt pcie_aspm=off pcie_acs_override=downstream,multifunction - Run:
proxmox-boot-tool refresh
- In my case:
- If Legacy (GRUB): Edit
Phase 4 - The “Anti-Crash” Secret (ACS Override)#
Without the ACS Override, Proxmox sees your NVMe and your Network Cards in the same IOMMU Group. When the VM starts, Proxmox detaches the NICs to get to the NVMe, killing your host’s connection.
The Fix: Adding pcie_acs_override=downstream,multifunction to the bootloader (as shown in Phase 3) breaks these “group” into individual groups.
Phase 5 - Verification & Safety Check#
- Update Initramfs: (Crucial to load VFIO drivers at boot)
update-initramfs -u -k all - Reboot and Check Groups: Run the IOMMU script to ensure your NVMe is now in a unique group.
- In my example: NVMe moved from Group 1 (shared with NICs) to Group 18 (isolated).
IOMMU Verification script
for d in /sys/kernel/iommu_groups/*/devices/*; do
  n=${d#*/iommu_groups/*}; n=${n%%/*}
  printf 'IOMMU Group %s ' "$n"
  lspci -nns "${d##*/}"
done;
Phase 6 - VM Configuration#
Now that the hardware is isolated, attach it via the Proxmox Web GUI:
- Machine Type: Set to q35 (better PCIe handling).
- Add PCI Device: Select your NVMe (07:00.0).
- ROM-Bar: Checked.
- All Functions: Checked.
- PCI-Express: Unchecked (start with this for best compatibility).